RSS Feed

Category Archives: Photos

Bran Muffin Mania

Posted on

IMG_3377

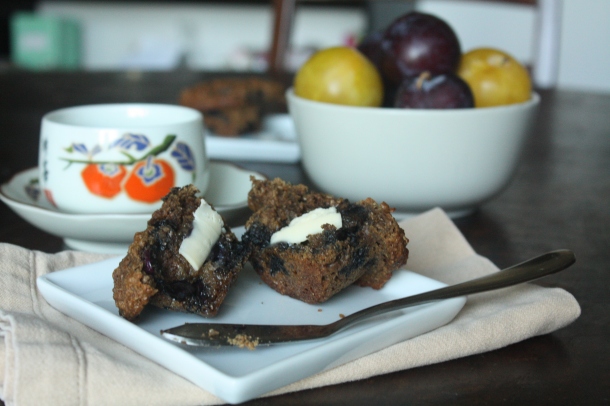
As a little girl growing up in Victoria, I remember regularly going to a “healthy” restaurant/bakery called Viteaway with my grandmother where she would buy me a “slug muffin”.  Though we called it a “slug muffin”, no slugs were harmed in the making of these oversized treats. These were sweet bran muffins topped with half a date that looked, to my imagination, like a slug and so they were named (not my greatest marketing moment).

While I was aware that bran was “good for me”, I enjoyed the crisp and crunchy top of the muffin, the dense, but fluffy, interior and the rich flavour of the molasses. The date (or “slug”) was an extra treat that I often kept until the end to savour the sweetness.

IMG_3379

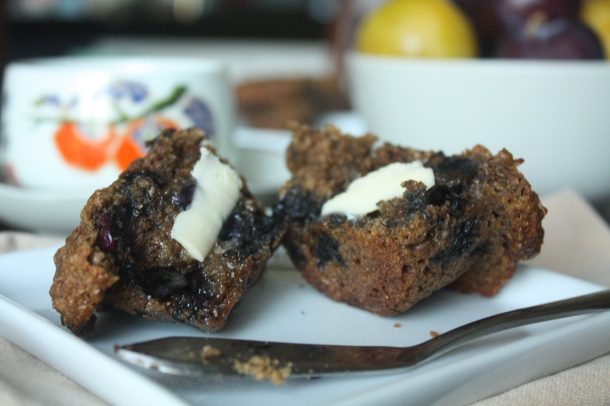
Since then I’ve appreciated the delicate contradiction of an excellent bran muffin: healthy/tasty, sweet/savoury, light/moist, soft/crispy. My son also enjoys a bran muffin that is well balanced, especially if it’s crammed full of blueberries.

This recipe serves up all the key elements and is easy to tweak with different combinations of spices and fruits. I’ve started with the version that takes advantage of fresh blueberries and and warms up the flavour with Chai Spice.

IMG_3373

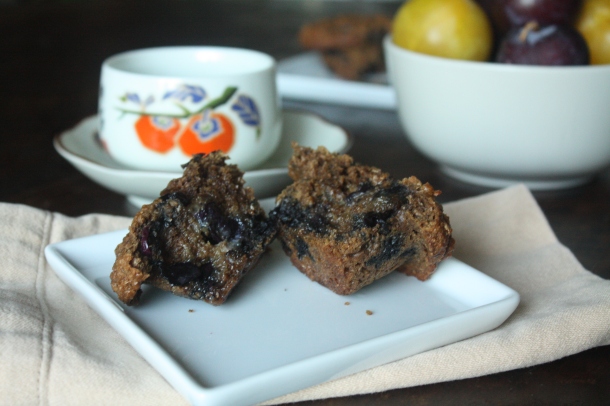
Blueberry Chai Bran Muffins

Ingredients

1/2 cup unsalted butter, softened

1 large egg, beaten lightly

1 cup yogurt (or sour cream)

1/4 cup molasses

1/4 cup light brown sugar, packed

1 cup fresh blueberries (or frozen)

1 cup flour

1 tsp baking soda

1/4 tsp salt

1 cup wheat bran

1 tsp Chai Spice

Method

  1. Preheat oven to 400
  2. Cream the butter and sugar until light and fluffy
  3. Beat in egg, yogurt and molasses
  4. Mix dry ingredients in a separate bowl and then add to the wet ingredients
  5. Stir in blueberries (if they are frozen, rinse them first with cold water to remove any ice crystals)
  6. Spoon the batter into a Perfect Portion Muffin Pan
  7. Bake for 15-20 minutes until springy to the touch
  8. Cool on a rack and enjoy

Variations

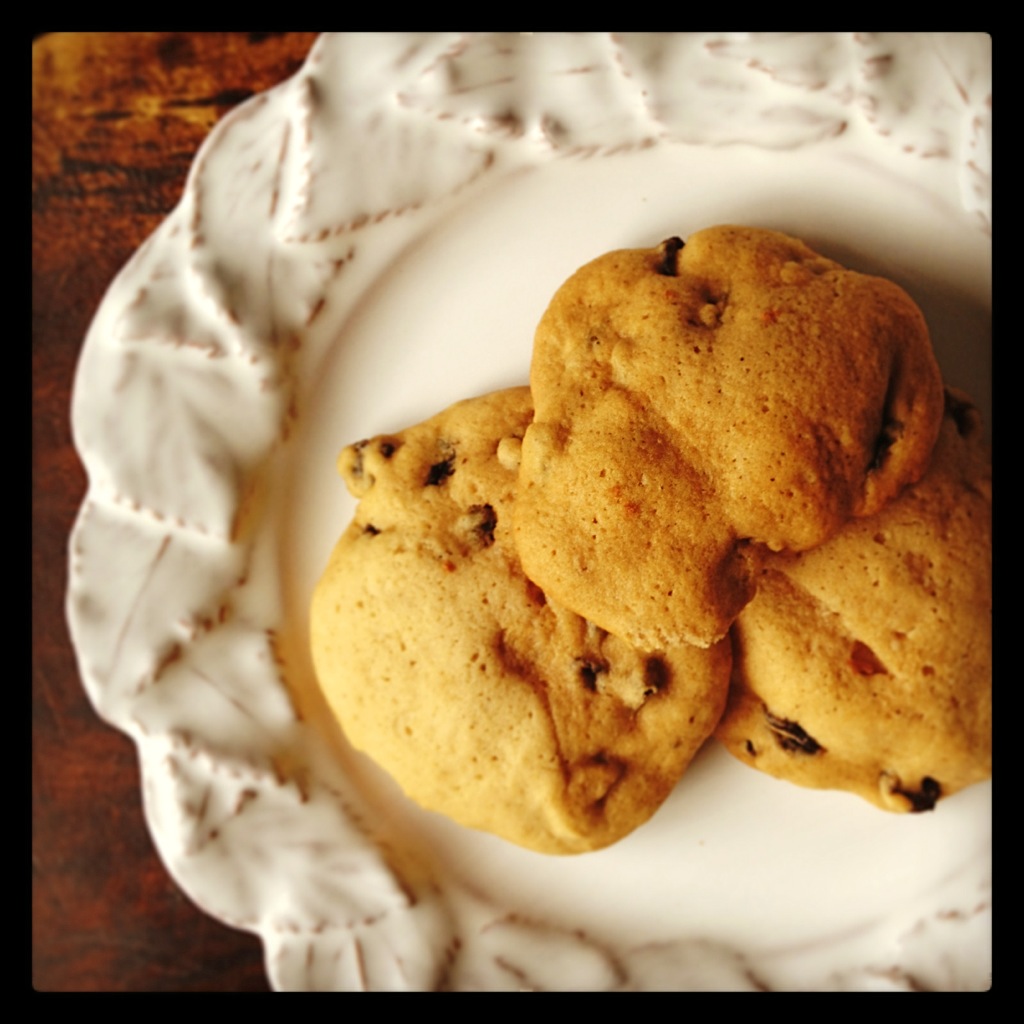
Ginger Raisin Bran Muffins

Substitute raisins for blueberries and ground ginger for the Chai Spice

Cranberry Bran Muffins

Substitute dried cranberries for blueberries and Pumpkin Spice for the Chai Spice

Kitchen Hack: plump up dried fruit for baking by covering with cold water in a small pot, bringing it to a boil and then letting them soak while you assemble the other ingredients. Add a cinnamon stick to the pot to add a bit of spice. The sweetened spicy water can also be used to thin the batter, if needed.

What is your flavourite fruit to add to bran muffins?

Advertisement

Kitchen Hack: Avocado Freshness

Posted on

IMG_3297

I hated avocados for decades, I thought they were slimy and gross. Until, one day I had a fresh guacamole that was more like salsa with firm chunks of barely ripe avocado than the green goo they sell at the grocery store. Since then, my love affair with avocados has only deepened, to the point that I will indulge daily.

IMG_3300

The trick with avocados is using them in that shoe window of gloriousness ripeness that passes all to soon. I have a trick that expands this opportune time from mere minutes (OK, maybe hours) up to a WHOLE WEEK.

IMG_3307

I buy my avocados in bulk, for the best price (sometimes at Costco), when they are rock hard and let them ripen on the counter. To speed up this process, place them near bananas (which release ethylene gas) or to super charge it, place the avocados in a brown bag WITH bananas.

Once they are ripe, keep them in the refrigerator until YOU are ready to use them!

Avocados are a wonderful source of fibre, monounsaturated fat (the good kind) and tons of vitamins and nutrients. I love using avocado in place of may for tuna salad. What’s you favourite way to enjoy a perfectly ripe avocado?

Pineapple Upside-Down Cake Conundrum

Posted on

IMG_6553
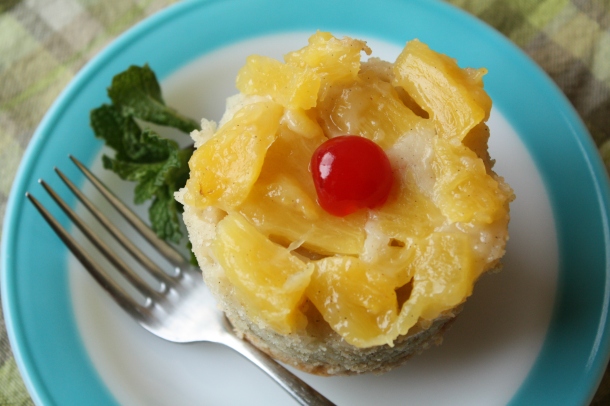
Pineapple Upside-Down Cake can be perplexing: How do you balance the flavours of fruit and cake? What’s the best way to invert the finished cake? When should you stop “testing” it to make sure every bite is equally delicious?

While these questions may not have plagued us for centuries, they have at least crossed MY mind. Fortunately, I found answers. The solution was in creating single servings of the topsy-turvy cake in mason jars.

IMG_0302

The individual serving size makes it easy to prepare, portion and present these sumptuous servings of sweet pineapple and almost savoury cake. The flavour of the cake offsets the pineapple with a hint of cardamom that gives a subtle tropical flavour.

IMG_0300

Pineapple Upside-Down Cake In-A-Jar

Topping Ingredients:

4 TBS unsalted butter

3/4 cup light brown sugar

1 diced whole pineapple (or substitute canned tidbits)

Topping Method:

  1. Grease the bottom and sides of six 250ml wide mouth mason jars with butter. Place on a lined baking sheet
  2. Melt butter in a medium saucepan on medium heat
  3. Add brown sugar, stir occasionally until the mixture is pale and foamy, about 3 to 4 minutes
  4. Distribute evenly into the mason jars and arrange pineapple in a single layer, but tightly packed together

Cake Ingredients:

1 1/2 cups unbleached all-purpose flour (organic, if possible)

3 TBS cornmeal

1/2 tsp salt

8 TBS butter, softened – but still cool

1 cup granulated sugar, plus 2 TBS (for egg whites)

4 large eggs, separated – at room temperature

2 tsp vanilla

2/3 cup milk

Cake Method:

  1. Pre-heat oven to 350
  2. Whisk dry ingredients together
  3. Cream butter in a mixer at medium speed
  4. Add sugar gradually and continue beating until light and fluffy (about 2 minutes)
  5. Beat in yolks and vanilla
  6. Reduce to low speed and add dry ingredients and milk, alternating between the two (begin and end with dry ingredients)
  7. Beat egg whites at low speed until frothy, then increase to med-high and beat to soft peaks
  8. Gradually add the remaining 2 TBS of sugar, continue to beat to stiff peaks
  9. Fold one quarter of the beaten egg whites into the batter
  10. Then fold in the remaining egg whites
  11. Distribute the batter evenly to mason jars
  12. Bake until the top of the cakes is golden and an inserted toothpick comes out clean (about 20 minutes)
  13. Let the cakes rest for 2 minutes then run a knife around the edge to loosen them, then individually invert the cake on plates
  14. Garnish with maraschino cherries and mint sprigs
  15. Serve and enjoy

IMG_6537
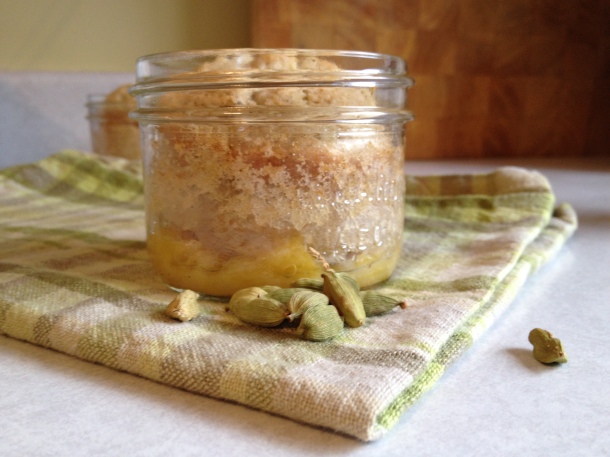
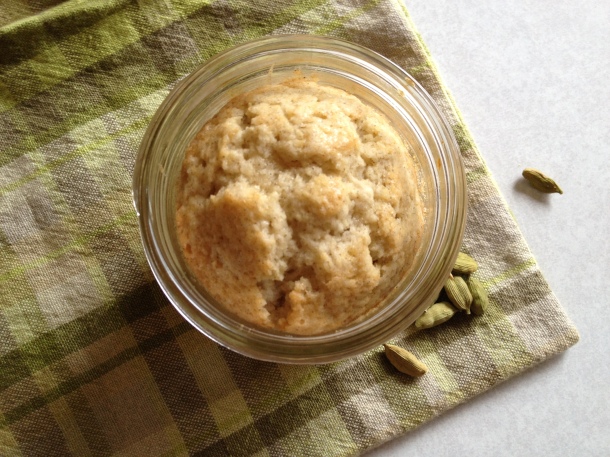
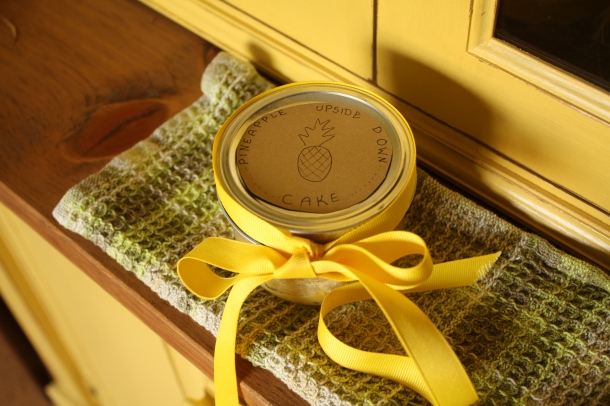
The mason jars also make it a snap to save or share the individual cakes. Who do you know that loves cake in a jar?

Brownie Brouhaha

Posted on

IMG_2581
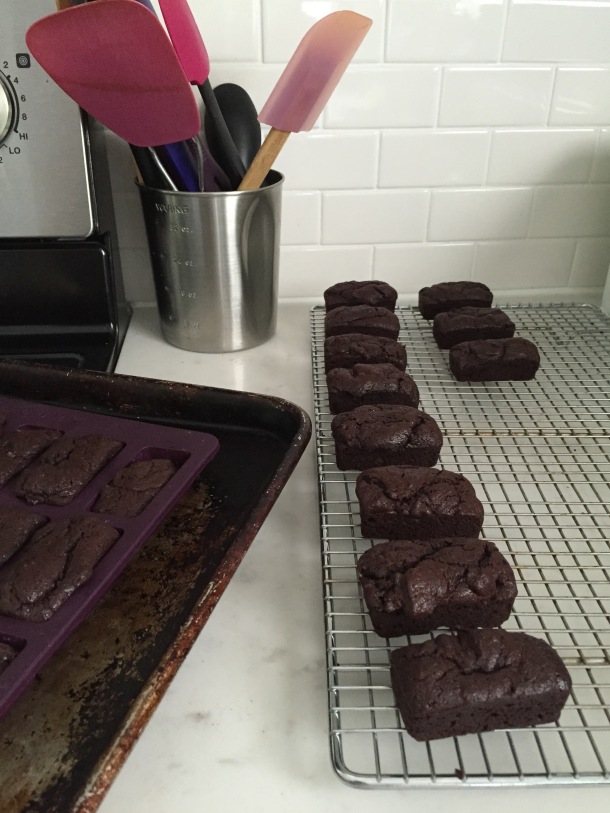
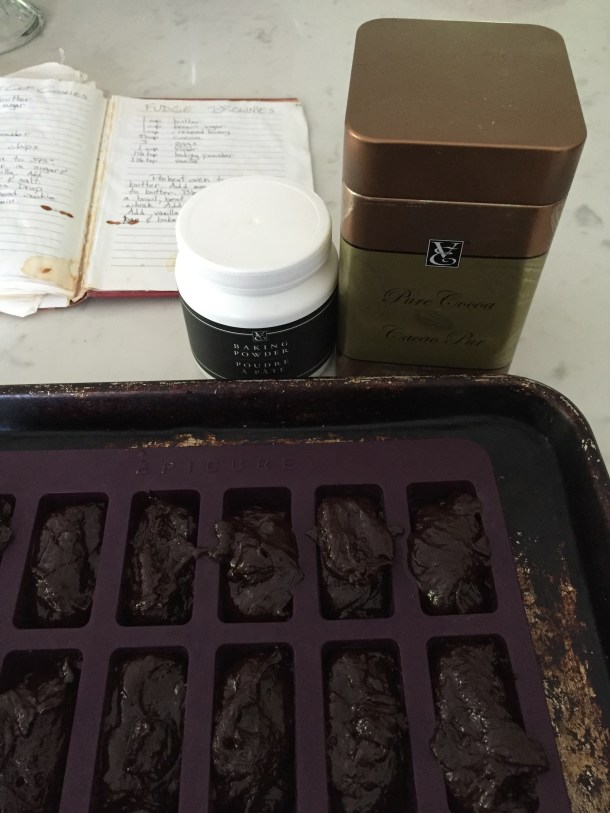
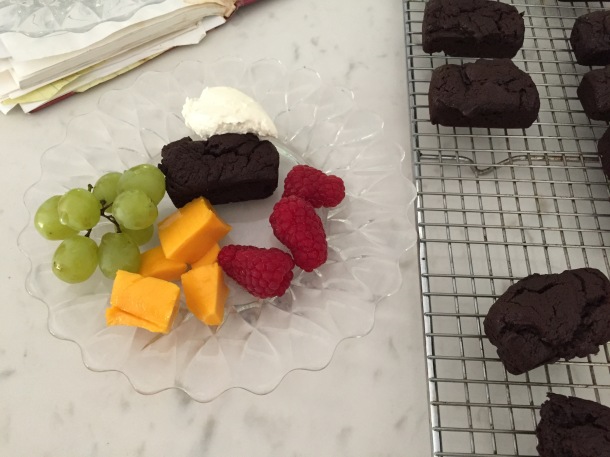
Brownies can be controversial, at least when it comes to my friends and family. Some factions say there needs to be frosting, others are in the cakey camp, while a few are stuck in the fudgey side. There is often heated debate about how Butterscotch Brownies (blondies) and Black Bean Brownies are not acceptable options at all. But, when I’m the one donning the apron I say nay to frosting and go for my tried and true One Pot Brownie recipe (please note: no pot is IN the brownies, they are mixed IN a pot).

IMG_2579

I have been using the same recipe since I started baking when I was eight (out of desperation as my mother wouldn’t bake or buy sweets as often as I wanted them). It has never failed me, though I have failed it on occasion. A couple of times, I MAY have over-baked the brownies until they were dried out. My problem solving brain and thrifty heart turned this loss into a win by making ice cream sandwiches with them!

IMG_2576

Kitchenette Brownies

Ingredients:

1 cup butter

1 cup brown sugar

1 cup creamed honey

2/3 cup cocoa powder

3 eggs

1 cup all purpose flour

1 1/2 teaspoon Epicure Baking Powder

1 1/2 teaspoon vanilla extract

Kosher Salt to taste

Method:

  1. Preheat oven to 350
  2. Melt butter in a saucepan on the stove
  3. Mix sugar, honey and cocoa powder into melted butter
  4. Add eggs and and mix with a whisk
  5. Add flour, baking powder and salt and gently combine
  6. Stir in vanilla extract
  7. Pour into a greased 8-9″ pan or the Epicure Perfect Petites for 30 lovely little loaves
  8. Bake for 25-30 minutes (until a toothpick comes out clean or just a bit crumby)

IMG_2583

Serve with fresh fruit (I had grapes, mango and raspberries) and a dollop of whipped cream (try not to over whip it like I did).

Which side of the brownie battle do you take or will you just take any brownie that’s available?

Buck Brand Citrus Bliss

Posted on
Buck Brand Finger Lime at Thrifty Foods

Buck Brand Finger Lime at Thrifty Foods

There is something truly special about tasting fresh produce while chatting with the farmer that brought it to fruition. When I heard that Lisle Babcock of Deer Creek Heights Ranch would be handing out samples of his terrific Buck Brand Organic Citrus at my local Thrifty Foods, I made a date with my mother to meet the man behind the oranges that we can’t get enough of every winter.

Lisle Babcock of Buck Brand Citrus at Thrifty Foods

Lisle Babcock of Buck Brand Citrus at Thrifty Foods

With his cowboy hat and many, “Ma’am”s Mr. Babcock was generous and genial with the samples of the many types of organic citrus that are currently in season on their ranch. Thrifty Foods has an exclusive deal to carry Buck Brand Organic oranges and some of their 80 different varieties of citrus fruits in British Columbia.

Buck Brand at Thrifty Foods

Buck Brand at Thrifty Foods

I go through bags and bags of their navel oranges every winter and supplement my citrus cravings with grapefruit, tangerines, pommelos, blood oranges, sweet limes and anything else that is available throughout the citrus growing season.

Buck Brand at Thrifty Foods

Buck Brand at Thrifty Foods

Until February 25th, when you buy a 4 lb. bag of Buck Brand Navel Oranges at Thrifty Foods, they will donate $1 to BC Lions Society’s Easter Seals Camps to fund kids camp fees at Easter Seals Camp Shawnigan and Camp Squamish. Plus you’re supporting a 5 acre family owned organic farm with almost 1000 citrus trees, including many heritage and hybrid varieties.

Buck Brand Citrus at Thrifty Foods

Buck Brand Citrus at Thrifty Foods

While all the citrus samples were delicious and juicy, I was most interested to try the Finger Lime, I’d seen all the pretty pictures on the internet and I was curious to see if they tasted as fascinating as they looked. Originally from Australia, Deer Creek Heights Ranch has been growing them in Terra Bella. California for 4 years. Lisle cut one in half and gave it a gentle squeeze to make the tiny little juice packets bubble up to the top, to be enjoyed like an ice cream cone. The flavour is similar to a very floral lime, quite tart and tangy, but it is the texture as the little pearls pop inside you mouth that is so delightful. I bought a 50g package to bring home and enjoy at my leisure and to share with my son.

Lisle Babcock of Buck Brand Citrus at Thrifty Foods

Lisle and Mary Lou Babcock of Buck Brand Citrus at Thrifty Foods

We had a great time chatting with Lisle and Mary Lou and I really appreciate that they make such an effort to share their luscious fruits and take the time to interact with Canadian consumers.

Buck Brand Citrus at Thrifty Foods

Buck Brand Citrus at Thrifty Foods

I now have a nice selection of citrus beautifying my kitchen counter and I’m faced with the delicious dilemma of incorporating them into a recipe or just enjoying them as nature intended.

Related Articles

New Ingredient: Finger Limes (gastronomiette)

Thrifty Foods Tour Maple Ridge: video (Meat of the Message)

What is your favourite citrus fruit outside the holy trinity of lemon, lime and orange?

Fave Foods from 2013

Posted on
Hermits by Kitchenette Finds

Hermits by Kitchenette Finds

Aloha Granola by Kitchenette Finds
Birthday Cake Extravaganza by Kitchenette FindsBirthday Cake Extravaganza by Kitchenette Finds
Farmhouse La Pyramide at Burdock & Co

Farmhouse La Pyramide at Burdock & Co

Canadian Mint Sundae at Glenburn Soda FountainCanadian Mint Sundae at Glenburn Soda Fountain
Green Chili by Kitchenette Finds

Green Chili by Kitchenette Finds

Mexican Firing Squad at Cuchillo

Mexican Firing Squad at Cuchillo

Juice Party at Nana's

Juice Party at Nana’s

Aloha and Almond Banana Breads by Kitchenette Finds

Aloha and Almond Banana Breads by Kitchenette Finds

Peardro by Kitchenette Finds

Peardro by Kitchenette Finds

Test Drive Burger

Test Drive Burger

Fried Chicken

Fried Chicken

Whether I made them or just ate them, here are a few bites that have fed my heart and soul this past year. I can’t wait to sink my teeth into 2013! Happy New Year!

Burdock and Co

Posted on
Cherry Leaf Cured Scallops, shiso rice crackers, cracked cherry pit ice

Fresh Oysters, finger lime caviar, fresh breakfast radish, chickweed, apple & verbena sorbet, kasu emulsion

Trying a brand new restaurant is just about our family’s favourite thing to do and when the chef/owner happens to be Andrea Carlson (Sooke Harbour House, Raincity Grill, Bishop’s, etc), who is not only an a fantastic cook but a long time friend, we get downright excited! So, we made sure the three of us were at the corner of Main and E 11th Ave for the very first public service of Burdock & Co.

2702 Main Street

2702 Main Street

After admiring the space (the former home of Cafeteria), we sat down and ordered some drinks. I had one of the two non-alcoholic cocktails, from a list designed by Lauren Mote of Kale and Nori Culinary Designs, the Cascadian Cooler.

Apple & Fenugreek, Lime, Mint, Denman Bitters, Gingerbeer

Apple & Fenugreek, Lime, Mint, Denman Bitters, Gingerbeer

The menu featured dishes showcasing local and seasonal ingredients in imaginative combinations that made it difficult to narrow down our selections, so we ordered almost the whole menu to share family style!

Cherry Leaf Cured Scallops, shiso rice crackers, cracked cherry pit ice

Cherry Leaf Cured Scallops, shiso rice crackers, cracked cherry pit ice

We started with the scallops and oysters (both requested by our 10-year-old son, Young Fresh Chef) which were delicate and delicious like a cool spring morning on the West Coast. We even nibbled on the cherry blossoms as instructed by our charmer of a server.

Urban Digs Egg, wild cress, hazelnut & blue cheese granola, brown butter & potato vinaigrette

Urban Digs Egg, wild cress, hazelnut & blue cheese granola, brown butter & potato vinaigrette

The flavour and textural combination of the poached egg and the savoury granola was my favourite of the night and I may have Mmmmmmmed out loud more than once! The peppery wild cress presented a nice contrast to the luxuriousness of the rest of the plate.

Fire Roasted Green Farro, spruce tips, black garlic, sorrel

Fire Roasted Green Farro, spruce tips, black garlic, sorrel

The vegan farro dish was my meat-loving husband’s top pick of the meal and the plate was scraped down to the ceramic glaze. The depth of flavour from the black garlic was earthy and sweet adding a soulful umami element to the farro.

Fried Chicken & Pickles, crispy skin, charred chili vinegar

Fried Chicken & Pickles, crispy skin, charred chili vinegar

Our son most enjoyed the fried chicken and he said that he could taste the love that was put into the preparation. The crispy skin was like chicken bacon and the accompanying pickled vegetables helped cut the richness of this dish.

Harvest Pork Belly Ramen, Candied Bacon, nori, fried egg

My husband and I were slowing down at this point, but the boy went full boar (pun intended) into the bowl of ramen.

Wheat Berry Risotto, sunroot, mustard greens, castelvetrano olives, Farmhouse 'Fermiere', smoked crema

Wheat Berry Risotto, sunroot, mustard greens, castelvetrano olives, Farmhouse ‘Fermiere’, smoked crema

The risotto was delicious and since the smoked crema would be good with almost anything, it just made the dish that much better. While this was a vegetarian dish, the dairy components gave it a rich taste and mouth feel.

Halibut, braised spring radish and hop shoots, pine mushroom and burdock tea, fried burdock, hop salt

While we should have been getting full after so much deliciousness, my fellas had their forks into the halibut before I could take a single photo! Like everything we tried, the dish was a tantalizing combination of ingredients with an excellent balance of flavours and was seasoned to perfection.

Gluten Free Cookies

Gluten Free Cookies

We still had a bit of room for dessert and we really enjoyed the gluten-free cookie selection by the soft glow of candlelight.

IMG_2728

We left with full bellies and hearts already plotting our return.


Burdock & Co

Open 7 days a week

from 5pm for dinner

no reservations

2702 Main Street

Vancouver, BC V5T 3E8

604-879-0077

email: eat@burdockandco.com

twitter: @burdockandco

website: www.burdockandco.com

Which dish pictured appeals most to your taste buds?

Happy Pi Day!

Posted on
The Perils of Peach Pie

The Perils of Peach Pie

March 14th is Pi day (3.14), I hope you are celebrating with real pie, I’m just sticking with pictures of pie. Up top is my Perfect Peach Pie and below is Not So Sour Cherry Pie. Enjoy!

Cherry Pie Serenade

Kitchenette’s Kitchen

Posted on
View from a fridge

View from a fridge

While pieces of my kitchen have appeared in the background of pictures of food, I thought it was time to put the work space front and centre. We redid the kitchen JUST in time to host our families for Christmas 2011. I wouldn’t recommend cutting it as close as we did, wee bit stressful. We replaced the stove and fridge, added a dishwasher, recovered the existing cabinets and added more counter space and open shelves.

The reno is sinking in

The reno is sinking in

We kept the sink and counters, as we were trying to keep the budget down. The faucet is new can be pulled out to fill large pots. By leaving the counter we saved a bundle and figured it would be easy to do later if we changed our minds.

Our sexy stove

Our sleek stove

We were going to get a glass top stove, but the sales rep basically talked us out of it. Our dream stove would be gas, but this isn’t our forever house so we kept it electric.

The cosy fridge nook

The cosy fridge nook

The fridge was the fanciest upgrade in the kitchen, with side by side compartments, ice machine and filtered water. It was larger than our previous refrigerator, but just by removing a bit of moulding and a dusty shelf it fit like it was custom-made.

Let there be light and a light breeze

Let there be light and a light breeze

The light fixture with fan is the priciest light fixture in our house, with all the rest coming from Home Depot, but it’s also the prettiest! Combined with the new hood any smells and smoke are whisked away in a quiet gust.

Stove top with pretty pots

Stove top with pretty pots

We added some butcher block counter top to the right of the stove to give us a larger work space. It was really a one person kitchen before, now it’s a 2 adult and a growing chef space.

Dishwasher that replaced me

Dishwasher that replaced me

The butcher block is in an L shape and covers the dishwasher and some open shelves for small appliances and bakeware. The Pacojet has since found a new home, where it will be used more than once a month.

Dry goods shelves and produce corner

Dry goods shelves & produce

My husband, Exec Chef designed these floating shelves that hold my spice jars, grains, beans and other dry goods. We always have a fruit bowl on the counter for quick snacks and garlic and onions out for easy access since we use them daily.

Shelves next to the stove

Shelves next to the stove

We also added two small floating shelves, of the same design, to the right of the stove. The lower shelf holds our kosher salt-cellar, pepper grinder and butter bell. On the upper shelf, I displayed some orange themed implements.

KitchenAid in the Corner

KitchenAid in the Corner

To the left of the sink, we have our knife block (away from little visiting hands) and my beautiful KitchenAid mixer, which I may not use everyday but it does make me smile.

Breakfast Central

Breakfast Central

To the right of the sink, we have our DJ station, bread box, toaster and blender. Which covers breakfast in our house on many mornings! The bottle matches my spice jars and is full of fantastic olive oil.

Thanks for taking a virtual tour of my shiny kitchen, it will never look this tidy again!

What is the one thing you wish you could most change about your kitchen?

Peanut Butter Cookie Cavalcade

Posted on
Peanut Butter Cookies on Parade

Peanut Butter Cookies on Parade

Twitter told me today that March 1st is Peanut Butter Lovers’ Day, not to be confused with Peanut Butter Day on January 24th. I was planning on making Peanut Butter Cookies anyway, but I decided to include my social networks in the process. I instagrammed, tweeted and facebooked and probably made some people drool in the process. Here are the Instagram photos with the accompanying tweets followed by the normal recipe.

Baking Peanut Butter Cookies for #PeanutButterLoversDay preheating oven to 375 as I tweet

Baking Peanut Butter Cookies for #PeanutButterLoversDay preheating oven to 375 as I tweet

Mixing 1/2 cup each of soft butter, light brown sugar & creamed honey for #PeanutButterLoversDay cookies

Mixing 1/2 cup each of soft butter, light brown sugar & creamed honey for #PeanutButterLoversDay cookies

1 egg, 1 cub pb, 1/2 tsp each bkng soda, vanilla & salt to butter, sugar & honey for #PeanutButterLoversDay

1 egg, 1 cub pb, 1/2 tsp each bkng soda, vanilla & salt to butter, sugar & honey for #PeanutButterLoversDay

Adding 1 cup of ap flour means the #PeanutButterLoversDay cookie dough is almost ready to roll!

Adding 1 cup of ap flour means the #PeanutButterLoversDay cookie dough is almost ready to roll!

Use wet hands to form 1TBS of #PeanutButterLoversDay cookie dough into rough ball shapes

Use wet hands to form 1TBS of #PeanutButterLoversDay cookie dough into rough ball shapes

Press wet fork in a # pattern on the balls of #PeanutButterLoversDay cookie dough. Bake @ 375 for 10-12 minutes

Press wet fork in a # pattern on the balls of #PeanutButterLoversDay cookie dough. Bake @ 375 for 10-12 minutes

#PeanutButterLoversDay cookies cooling. Help yourself to a virtual cookie to celebrate!

#PeanutButterLoversDay cookies cooling. Help yourself to a virtual cookie to celebrate!

Recipe for Peanut Butter Cookies

makes about 3 dozen

Ingredients:

1/2 cup soft butter

1/2 cup brown sugar – packed (I prefer light brown)

1/2 cup honey (the written recipe says 1/2 cup white sugar, but I always use honey)

1 egg

1 cup peanut butter

1/2 tsp kosher salt (or to taste)

1/2 tsp baking soda

1/2 tsp vanilla (or to taste)

1 cup all-purpose flour

Method:

1. Preheat oven to 375.

2.Cream butter with sugar (and honey if using instead of 1/2 cup sugar).

3. Beat in egg, peanut butter, salt, baking soda and vanilla.

4. Add flour.

5. Roll about 1 Tablespoon of dough into balls with wet hands and place with lots of space between on a cookie sheet.

6. Press a wet fork gently in a cross pattern on the balls of dough.

7. Sprinkle with kosher salt (optional)

8. Bake for 10 to 12 minutes or until the bottoms are golden brown.

What’s your favourite way to use peanut butter?

%d bloggers like this: