There is the family you are born into (or adopted into) that you make the best of and there is the family you create that you try to make the best. I was luckily born into a family that accepts me for who I am and loves me for all I am. Each passing year I grow to appreciate them more and more. Luck is less a part of the family I’ve made with my friends and my husband and more about learning and growing. I’ve surrounded myself with people who are worth the effort and never stop trying to show them how much I care.
Once in a while a moment comes when I’m forced to consider what my days would be like without certain people in my life. I’m a contingency planner and I usually have plans B through Z ready to go. But trying to picture picking up the pieces and putting them back together without the corner pieces means it will never be complete again.
So, how do I show the people I love with every beat of my little heart the depth of what they mean to me? I bake. I measure and mix and blend and fold and frost and fret. You are what you eat and I want them to taste the love I attempt to infuse in every morsel. Loving someone with all your heart is to risk breaking it while attempting a new recipe is a risk baking it.
I never liked angel food cake. Mostly, I’d sampled grocery store versions or ones that tasted like the box they came in. I liked the name and the look, but had never enjoyed the taste. I found it dry and spongy with a fake almond-ish aroma with no real flavour to savour. I’d never thought of trying to make one, because I didn’t see the point. Then I had a request for one from a lovely someone celebrating an extra extraordinary birthday. Now, as much as I like to cook and bake for friends, loved ones and random strangers, I rarely take requests. It’s more about a recipe that I’ve been waiting for an opportunity to try, or an ingredient that I need to use up.

When venturing into new recipe territory I call on my trusted baking reference Baking Illustrated: The Practical Kitchen Companion for the Home Baker which I love for its breakdown and explanation of how they tested and re-tested their version of the classics and the thought process behind the evolution. With their recipe for a blueprint, I then searched the Internet for sure-fire tips and tricks to make it as fool-proof as possible. The most useful answers I found were on the America’s Test Kitchen Feed website. Not surprising, since America’s Test Kitchen is the crew behind Baking Illustrated!
Technique and tasks down, I just needed the tools. Thankfully my thoughtful and hopeful husband had given me my first food processor for Christmas and my Mother’s Day Kitchen Aid Mixer without which I probably would not have dared to take on the Angel Food Cake challenge. The last key item was an Angel Food Cake pan that had belonged to my Mother-In-Law, so I was confident it was imbued with baking magic as she was the most gifted home baker I’ve ever seen.

I baked the cake the night before the momentous birthday and let it cool overnight. In the morning I tossed together a citrus salad with tangerines, oranges, Meyer lemons, sweet limes, pink grapefruit and pomelo. A touch of honey and a pinch of kosher salt balanced the flavours. The Kitchen Aid mixer was put to use again to quickly whip some organic heavy cream with powdered sugar, homemade vanilla extract and a smidgen of kosher salt.

I admit that I was a bit nervous when I gently cut into the cake with a serrated knife. Would it be mushy in the middle? Overly dry? No. It was heavenly. I finally understood that Angel Food Cake is just a moist meringue given structure by the flour. The vanilla, lemon and almond came together in a celestial harmony that had me savouring every bite. The slightly sweetened whipped cream and the brightly flavoured citrus salad made each forkful an enjoyable combination of texture and tastes. The cake was a hit! Watching some of my favourite people on this planet enjoying my very first Angel Food Cake made my heart soar high above the clouds.

Ingredients:
1 cup (3 ounces) plain cake flour
1 1/2 cups (10 1/2 ounces) sugar
12 LARGE egg whites (1 3/4 cups plus 2 Tablespoons) at room temperature
1 teaspoon cream of tartar
1/4 teaspoon salt
1 1/2 teaspoons vanilla extract
1 1/2 teaspoons juice from 1 lemon
1/4 teaspoon almond extract
Method:
1. Preheat oven to 325 once oven rack is in the lower-middle position. Have an UNgreased tube pan (9 inch diameter, 16 cup capacity) at the ready. Removable bottom pans are best, but if not an option then line with parchment paper.
2. Process granulated sugar in a food processor until powdery. Remove about half of the sugar and reserve in a small bowl.
3. Add the flour to the food processor and aerate them until mixed and fluffy.
4. Beat the egg whites at low-speed until just broken up and beginning to froth. Add the cream of tartar and salt and continue to beat at medium speed until soft, billowy mounds form. Still at medium speed, beat in the reserved sugar, 1 Tablespoon at a time and mix until soft shiny peaks form. Add the vanilla, lemon juice and almond extract, beat until blended.
5. Sift the flour-sugar mixture oven the beaten egg whites in three additions gently folding the flour-sugar mixture in after each addition with rubber spatula.
6. Scrape the cake batter into the pan gently and smooth the top with the spatula then give the pan a couple of raps on the counter to release any large air bubbles.
7. Bake until the cake is golden brown and the top springs back when firmly pressed (50-60 minutes).
8. If the cake pan has feet around the rim, invert the pan so it rests on them. If there are no feet invert the pan onto the neck of a bottle. Let the cake cool completely, 2 to 3 hours.
9. Once cool, run a knife around the edge of the pan. Slide the cake out and cut around the removable bottom or peel off the parchment. Use a serrated knife to cut, serve the same day.


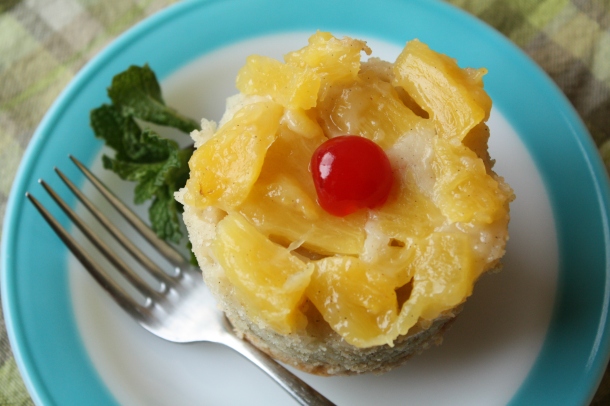 Pineapple Upside-Down Cake can be perplexing: How do you balance the flavours of fruit and cake? What’s the best way to invert the finished cake? When should you stop “testing” it to make sure every bite is equally delicious?
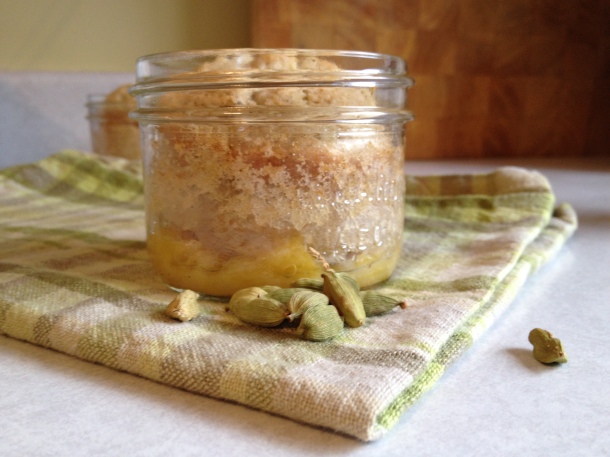
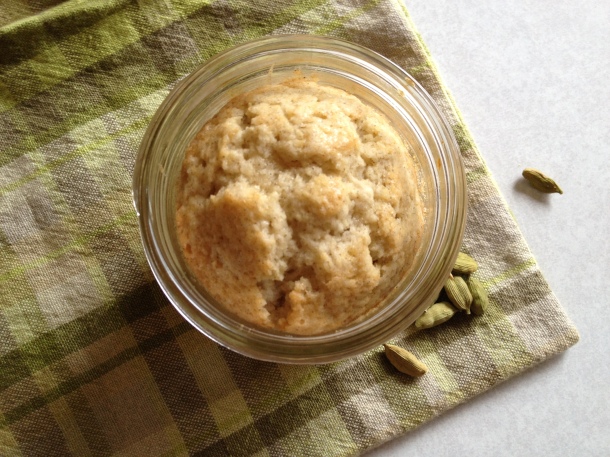
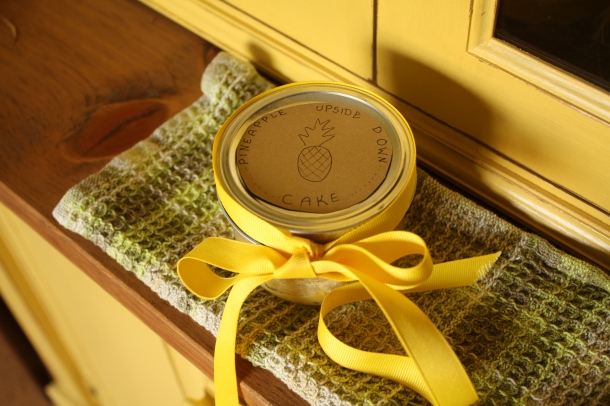 The mason jars also make it a snap to save or share the individual cakes. Who do you know that loves cake in a jar?
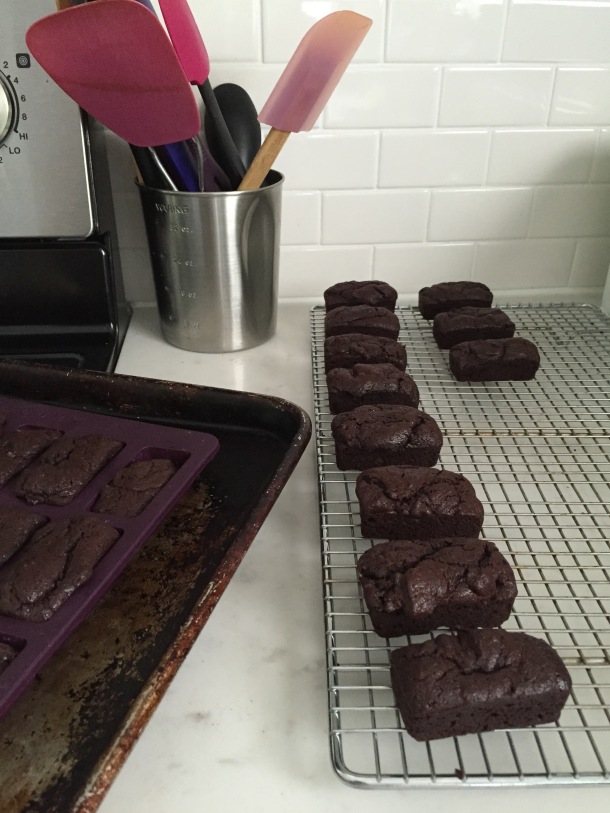
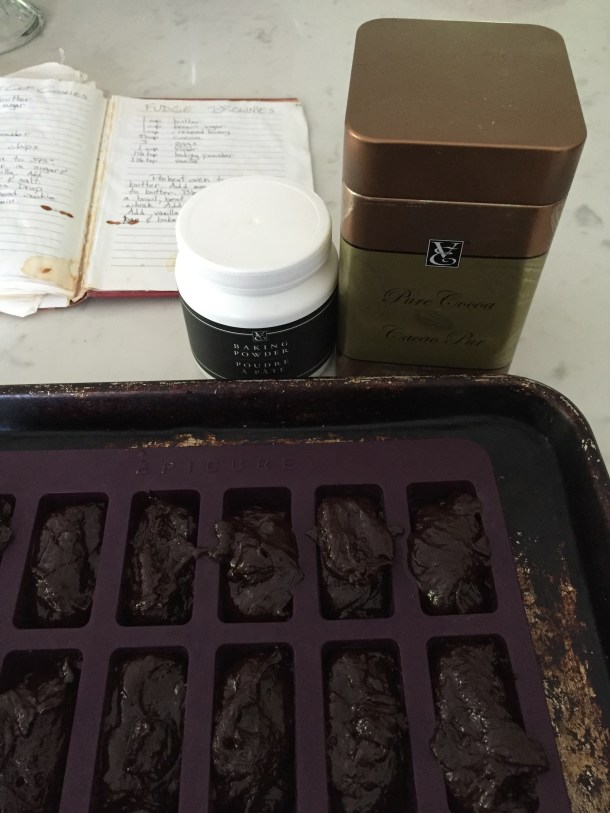
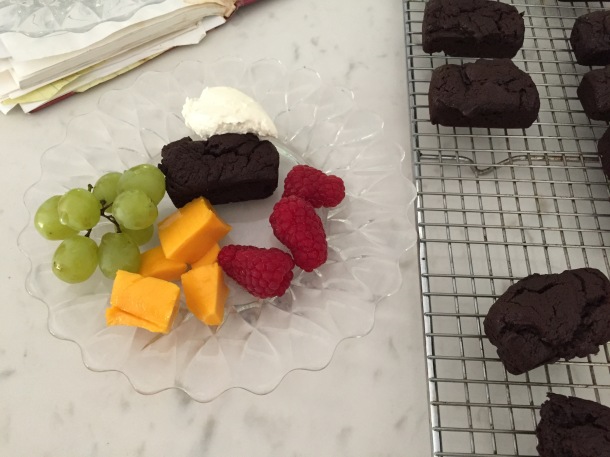 Brownies can be controversial, at least when it comes to my friends and family. Some factions say there needs to be frosting, others are in the cakey camp, while a few are stuck in the fudgey side. There is often heated debate about how Butterscotch Brownies (blondies) and