RSS Feed

Cranberry Craze

Posted on

When the leaves twist and turn and fall into colourful piles, waiting for boots to crunch their way through, it’s time to prepare for comfort food simmering on the stove. Years ago we started a tradition for Thanksgiving and Christmas that Young Fresh Chef and I make a batch of homemade cranberry sauce. Mostly I do the prepping and cooking and he just lets me know when it is sweet enough. I had always been a fan of the canned variety, piling it on turkey sandwiches and maybe even eating a spoonful on the sly. 

But when you look at the ingredient list on the can it is short and sweet: CRANBERRIES, GLUCOSE-FRUCTOSE, GLUCOSE, WATER. I knew I could do better. I researched recipes years ago and I took the bits and pieces that appealed to me and created my ultimate cranberry sauce! The least daunting of the traditional turkey accompaniments, it’s a great take along if you are invited to a holiday feast.

Living in the heart of B.C.’s cranberry country, I can usually buy cranberries in the Fall, fresh from the bog, at the local Farmers’ Market. They are also easy to find in the produce section in your grocery store this time of year. I usually pick up some extra to fill a vase or pile around a pillar candle for a centre-piece.

Once you have the cranberries, next come the seasonings, and while it is necessary to add some sweetener to balance out the pucker inducing tartness of the berries, you can also add some holiday spice to add layers of flavour. The key to keeping it on the savoury side instead of being jelly is bay leaf and white peppercorns. By placing the smaller spices in a tea ball (or a cheese cloth pouch) you don’t have to fish them out individually, or wonder where that last clove is hiding.

While cranberry sauce completes the holiday table and elevates turkey to a special occasion, it’s also great mixed in with yogurt and granola, slathered on a peanut butter sandwich or maybe just a straight spoonful or two!

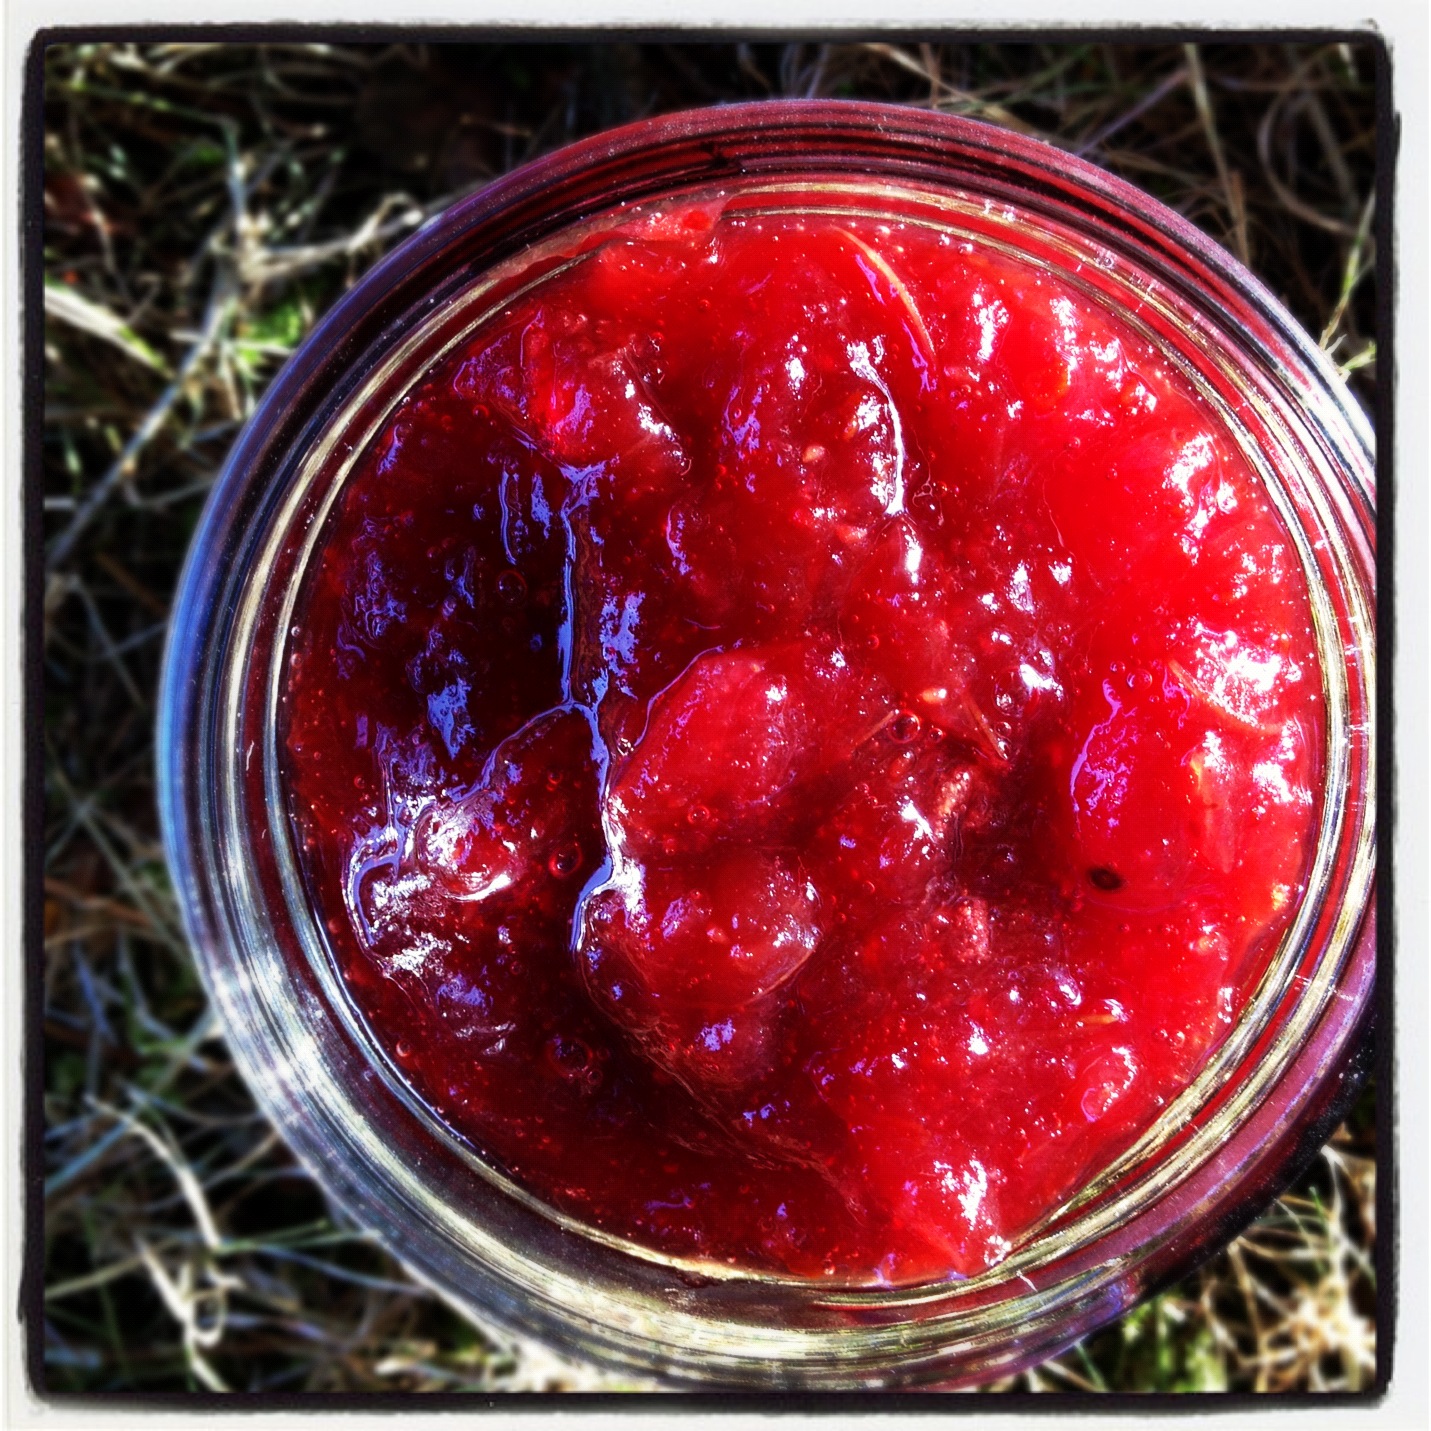
Recipe for Spiced Cranberry Sauce

Ingredients:

1 12-ounce bag of fresh cranberries

1 3/4 cups apple cider or juice

3/4 cup honey (or other sweetener to taste)

1 cinnamon stick, broken in half

zest of 1 unsprayed/organic orange

3 whole cloves

4 white or black whole peppercorns

2 bay leaves

1 piece of nutmeg seed (optional)

1 thread of mace (optional)

1 allspice berry (optional)

1 star anise pod (optional)

3 cardamom pods (optional)

1 piece crystallized ginger (optional)

salt to taste

Method:

1. Place small spices in a tea ball or make a cheesecloth pouch tied with string.

2. Place all ingredients in heavy large saucepan.

3. Bring to a boil over medium heat.

4. Simmer until berries burst and sauce thickens, stirring occasionally (about 20-25 minutes).

5. Remove cinnamon stick, bay leaves and spices.

6. Allow to cool, the sauce will thicken up even more.

7. Refrigerate sauce until cold.

8. Serve with turkey, or yogurt or swirl into muffin batter!

The sauce can be made up to 3 days ahead. Cover and keep refrigerated.

Share your favourite homemade holiday tradition in the comments.

Icy Huggy Cake

Posted on

For our Young Fresh Chef’s birthday we had a skating party with friends and family. There was hot chocolate, marshmallows, chocolate sprinkles and Halloween crafts. There was also cake. For the past few years the deal has been that I make the cakes from scratch and my husband, Exec Chef decorates them. This way, he can take it to the restaurant to work on in his spare seconds and the boy won’t see it until the big reveal at the party.

Since we didn’t have much of a theme to work with this year besides ice and cold, I came up with the concept of making a cake that looked like one of the Papertoy Monsters that our boy had constructed from the book by Brian Castleforte (what a cool last name).

The featured creature on the book cover was one of the first Papertoy Monsters that Young Fresh Chef constructed, Icy Huggy. To my eye, he was the cutest monster and fit well with an ice skating party.

Vanilla cake was requested, so I worked on baking three 9X13″ cakes from scratch, while Exec Chef mulled over our son’s instructions to use as little icing as possible. The boy is known to scrape the majority of icing off any cupcakes or cake slices that come his way, he’s really more of a pie guy. Then he had a brilliant idea, cotton candy. Perfect for the blue fur on Icy Huggy! I remembered seeing blue cotton candy at the candy store at the mall.The cakes were then whisked away to be constructed and decorated for the party.

I tried to capture the birthday boy’s reaction when he saw the cake, but he was just a blur from all the excited jumping up and down. He was surprised, thrilled and impressed. He absolutely LOVED the cotton candy as icing substitute. For once he got have his cake and eat it too (no scraping needed).

What’s the most inventive way you’ve decorated a cake?

Schools Snack Local

Posted on

At the beginning of this school year, I began volunteering at my son’s school to help out with the BC School Fruit and Vegetable Nutritional Program. Thirteen times throughout the school year, schools can receive fresh local BC produce at no cost to the school, children or parents. It’s run by the BC Agriculture in the Classroom Foundation (supported by the Ministries of Agriculture, Education and Health) and began with 10 schools in 2005 and this year they are getting fresh fruits and veggies to almost half a million kids at 1376 schools in BC.

I’ve really enjoyed being part of this program and working with the other parent volunteers to sort and deliver plums, peaches and grapes to the classrooms in our local school. What a great way to share and celebrate the bounty of BC and to offer children the chance to broaden their palates and enjoy a healthy snack.

Were you already aware of this program? Have lunches ever come back with unexpected peach or plum pits?

Black Bean Brownie Bandwagon

Posted on

I’ve noticed lots of recipes for Black Bean Brownies all over the internet. Some are just regular old butter and sugar brownie recipes while others are vegan, gluten-free, carob recipes. I was looking for something in between. Now, I’m not a big fan of sneaking healthy stuff into treats. I’m more of an eat yer veggies and then enjoy a homemade dessert kind of gal. But, I was going to a barbeque where there was one child with diabetes and another on a gluten free diet. I really wanted to take a dessert that they could both dig into and that maybe even some of the grown ups might enjoy.

I couldn’t find the perfect recipe online, so I concocted my own cobbled together version. They were pretty easy to make, but I did a test run to make sure they’d be good enough to share. When my son, the Young Fresh Chef, tried his first one I asked him what he thought the secret ingredient was. He chewed and thought, then guessed, “Plums?” (We had just bought some gorgeous purple plums) When I told him it was black beans, he shrugged, nodded and ate another one.

All the kids at the barbeque were intrigued by the concept of beans in brownies.After dinner, the bars disappeared rather quickly and there were lots of dimpled chocolate dusted cheeks and whispered requests for the recipe. I even got my husband, the Executive Chef, to try a bite and his, “Not as bad as I thought it would be.” was higher praise than I had ever hoped. Though he totally objects to them being called brownies, he will tolerate the term “bars”.

Black Bean Brownies

I used dried beans that I cooked in my slow cooker with no pre-soak and it took about 6 hours. While the beans were cooling I added a vanilla bean so they would suck up the flavour.

The sweetener can be tweaked to your own taste or what’s available in your pantry. I try to use small amounts of different sweeteners so that there isn’t a predominant taste of any one.

These could also be veganized by using an egg substitute.

Ingredients:

3 eggs

1/2 cup cocoa powder or cacao powder

1/2 cup walnuts

1 Tablespoon vanilla extract

1/2 teaspoon baking soda

3 Tablespoons coconut oil

4 Medjool dates (approximately 1/4 cup)

1/4 cup coconut sugar

1/4 cup agave syrup

1/4 cup xylitol

2 cups black beans (rinsed, if canned)

1/2 teaspoon Kosher salt

1/4 teaspoon maple syrup extract

Method:

1. Preheat oven to 325.

2. Line a 11X13 baking pan with parchment paper.

3. Place all of the ingredients in a high-powered blender or food processor and blend until fully combined and the beans and walnuts are indistinguishable.

4. Scrape the mixture into the lined pan. Bake until the middle has set, about 30-45 minutes. Let cool COMPLETELY before cutting.

I cut them up into 24 rectangles and froze the extra ones in snack size bags inside one large freezer bag for school lunches.

These taste even better with a smear of peanut butter, you know, if you’re into that kind of thing!

Cherry Pie Serenade

Posted on

Lattice-Top Pie Dough

Ingredients:

3 cups (15 oz) unbleached all-purpose flour

1 teaspoon salt

2 Tablespoons sugar

7 Tablespoons  vegetable shortening, chilled

10 Tablespoons cold unsalted butter, cut into 1/4 inch pieces

8-10 Tablespoons ice water

Method:

1. Blend the flour, salt and sugar in a food processor until combined. Add in the shortening and pulse until it has the texture of coarse sand (about 10 seconds). Space the butter pieces evenly on top of the mixture; pulse until the texture is that of coarse crumbs, with the butter bits no larger than pea size (about 10 1-second pulses). Transfer mixture to a medium size bowl.

2. Sprinkle 8 Tablespoons of the ice water over the mixture. Use a rubber spatula in a folding motion to combine. Press firmly down of the dough with the spatula until it sticks together, use the remaining 2 Tablespoons of ice water if needed. Divide the dough into two balls (16 oz and 14 oz) and flatten into discs (5 inches and 4 inches). Wrap separately in cling film and refrigerate for at least one hour, or up to 2 days, before rolling out.

Lattice-Top Sour Cherry Pie

Ingredients:

1 recipe Lattice-Top Pie Dough

Flour for dusting the work surface

1/4 cup (1 oz) cornstarch

1 cup sugar (plus 1 Tablespoon for the top crust)

1/4 teaspoon ground cinnamon

pinch of salt

drop of pure almond extract (or teaspoon of almond liqueur )

sour cherries (one tree full or about 6 cups, pitted)

Method:

1. Remove dough from the refrigerator and allow to sit until malleable. Roll the larger disc to a 15 inch by 11 inch rectangle, about 1/4 inch thick, between two sheets of parchment paper then transfer to a parchment lined baking sheet (you can reuse one of the parchment sheets to roll the bottom crust). Trim the long sides of the rectangle and then cut lengthwise into 8 strips (15 inches long by 1 1/4 inches wide). Place the baking sheet in the freezer until firm (about 30 minutes).

2. Roll out the smaller piece of dough to a 12 inch circle. Transfer to a 9 inch pie plate. Leave the dough that overhangs the lip of the pie plate and place in the freezer until firm (about 15 minutes).

3. Mix the cornstarch, sugar (adjust to taste), cinnamon and salt in a medium bowl. Toss with the cherries and almond extract  (or almond liqueur).

4. Take the dough strips out of the freezer, if they are too stiff to be flexible, let them warm up just a bit. Weave the strips into a lattice top (Smitten Kitchen has a great MacPaint How To). Put back into the freezer until firm again (about 15 minutes)

5. Adjust an oven rack to the lowest position and place a baking sheet on it (to catch any excess juices) and preheat to 500.

6. Take the dough covered pie plate from the freezer and fill with the cherry mixture. Remove the lattice top from the freezer and place on top of the filled pie crust. Trim the lattice scraps and fold the overhanging dough into a crimped pattern. Lightly brush the lattice with 1 Tablespoon water and sprinkle with 1 Tablespoon sugar.

7. Turn the oven down to 425 and place the pie on the baking sheet. Bake until the crust begins to brown (25 to 30 minutes). Rotate the pie and turn the oven to 375; continue baking until the crust is a deep golden brown and the cherry juices are bubbling up (25 to 30 minutes longer).

8. Cool the pie on a wire rack for a minimum of 2 hours before serving. Cut at least two slices before you try to remove one.

Photos: Macro Spring Produce

Posted on


Virtual Chocolate Chip Cookies for Father’s Day

Posted on

Happy Father’s Day to all the dads! I hope you get something sweet to thank you for all the parenting you do. If you need to drop a hint, here’s a link for a fantastic chocolate chip cookie recipe.

Just remember to share a few with your kids!

Earth Angel Food Cake

Posted on


There is the family you are born into (or adopted into) that you make the best of and there is the family you create that you try to make the best. I was luckily born into a family that accepts me for who I am and loves me for all I am. Each passing year I grow to appreciate them more and more. Luck is less a part of the family I’ve made with my friends and my husband and more about learning and growing. I’ve surrounded myself with people who are worth the effort and never stop trying to show them how much I care.

Once in a while a moment comes when I’m forced to consider what my days would be like without certain people in my life. I’m a contingency planner and I usually have plans B through Z ready to go. But trying to picture picking up the pieces and putting them back together without the corner pieces means it will never be complete again.

So, how do I show the people I love with every beat of my little heart the depth of what they mean to me? I bake. I measure and mix and blend and fold and frost and fret. You are what you eat and I want them to taste the love I attempt to infuse in every morsel. Loving someone with all your heart is to risk breaking it while attempting a new recipe is a risk baking it.

I never liked angel food cake. Mostly, I’d sampled grocery store versions or ones that tasted like the box they came in. I liked the name and the look, but had never enjoyed the taste. I found it dry and spongy with a fake almond-ish aroma with no real flavour to savour. I’d never thought of trying to make one, because I didn’t see the point. Then I had a request for one from a lovely someone celebrating an extra extraordinary birthday. Now, as much as I like to cook and bake for friends, loved ones and random strangers, I rarely take requests. It’s more about a recipe that I’ve been waiting for an opportunity to try, or an ingredient that I need to use up.

When venturing into new recipe territory I call on my trusted baking reference Baking Illustrated: The Practical Kitchen Companion for the Home Baker which I love for its breakdown and explanation of how they tested and re-tested their version of the classics and the thought process behind the evolution. With their recipe for a blueprint, I then searched the Internet for sure-fire tips and tricks to make it as fool-proof as possible. The most useful answers I found were on the America’s Test Kitchen Feed website. Not surprising, since America’s Test Kitchen is the crew behind Baking Illustrated!

Technique and tasks down, I just needed the tools. Thankfully my thoughtful and hopeful husband had given me my first food processor for Christmas and my Mother’s Day Kitchen Aid Mixer without which I probably would not have dared to take on the Angel Food Cake challenge. The last key item was an Angel Food Cake pan that had belonged to my Mother-In-Law, so I was confident it was imbued with baking magic as she was the most gifted home baker I’ve ever seen.

I baked the cake the night before the momentous birthday and let it cool overnight. In the morning I tossed together a citrus salad with tangerines, oranges, Meyer lemons, sweet limes, pink grapefruit and pomelo. A touch of honey and a pinch of kosher salt balanced the flavours. The Kitchen Aid mixer was put to use again to quickly whip some organic heavy cream with powdered sugar, homemade vanilla extract and a smidgen of kosher salt.

I admit that I was a bit nervous when I gently cut into the cake with a serrated knife. Would it be mushy in the middle? Overly dry? No. It was heavenly. I finally understood that Angel Food Cake is just a moist meringue given structure by the flour. The vanilla, lemon and almond came together in a celestial harmony that had me savouring every bite. The slightly sweetened whipped cream and the brightly flavoured citrus salad made each forkful an enjoyable combination of texture and tastes. The cake was a hit! Watching some of my favourite people on this planet enjoying my very first Angel Food Cake made my heart soar high above the clouds.

Ingredients:

1 cup (3 ounces) plain cake flour

1 1/2 cups (10 1/2 ounces) sugar

12 LARGE egg whites (1 3/4 cups plus 2 Tablespoons) at room temperature

1 teaspoon cream of tartar

1/4 teaspoon salt

1 1/2 teaspoons vanilla extract

1 1/2 teaspoons juice from 1 lemon

1/4 teaspoon almond extract

Method:

1. Preheat oven to 325 once oven rack is in the lower-middle position. Have an UNgreased tube pan (9 inch diameter, 16 cup capacity) at the ready. Removable bottom pans are best, but if not an option then line with parchment paper.

2. Process granulated sugar in a food processor until powdery. Remove about half of the sugar and reserve in a small bowl.

3. Add the flour to the food processor and aerate them until mixed and fluffy.

4. Beat the egg whites at low-speed until just broken up and beginning to froth. Add the cream of tartar and salt and continue to beat at medium speed until soft, billowy mounds form. Still at medium speed, beat in the reserved sugar, 1 Tablespoon at a time and mix until soft shiny peaks form. Add the vanilla, lemon juice and almond extract, beat until blended.

5. Sift the flour-sugar mixture oven the beaten egg whites in three additions  gently folding the flour-sugar mixture in after each addition with rubber spatula.

6. Scrape the cake batter into the pan gently and smooth the top with the spatula then give the pan a couple of raps on the counter to release any large air bubbles.

7. Bake until the cake is golden brown and the top springs back when firmly pressed (50-60 minutes).

8. If the cake pan has feet around the rim, invert the pan so it rests on them. If there are no feet invert the pan onto the neck of a bottle. Let the cake cool completely, 2 to 3 hours.

9. Once cool, run a knife around the edge of the pan. Slide the cake out and cut around the removable bottom or peel off the parchment. Use a serrated knife to cut, serve the same day.

Video: Guacamole Giddiness

Posted on

I have not always been an avocado fan, in fact I would have to describe myself as anti-avocado in the past. My family would enjoy “alligator pears” with just a spoon and a smile while I gagged in the background. It was mostly a texture thing, I refused to eat salads that were slimed with ripe avocado or swampy looking guacamole. I started to tolerate small touches of avocado in sushi rolls, but only after scraping off any brown bits. After that slippery slope, I began sliding my tortilla chips into seven layer dip, trying to keep the green goo to a minimum. I finally leapt in and became an avocado convert after my talented husband, Exec Chef, made a chunky tomato heavy guacamole at home. I’d always known guacamole as greenish sludge that sat there limply until it turned brown and crusty. When I changed my perception and saw it more as a relative of salsa, which I eat by the sombrero full, it became a lot more appealing. Once that first batch ran out, I dared to make my own. I tweaked and seasoned until it tantalized my taste buds and then proceeded to demolish the entire bowl on my own. Since then I have hoarded avocados, impatiently waiting for them to ripen and then concocting bright fresh gloriously green guacamole!

Recipe: Chunky Guacamole

Serves: me

Ingredients:

3 ripe avocados

1/2 small red onion

2 small tomatoes

2 limes (more if they are dry)

1 medium jalapeño

1/2 bunch of cilantro

salt & pepper to taste

Method:

Cut the limes in half and squeeze the juice into a bowl.

Cut the avocados in half and remove the pit. You can scoop out the flesh, but I like to peel them.

Chop up the avocado and add it to the lime juice.

Dice the tomatoes and mix with the avocados and lime juice.

Using a rubber glove (or a latex glove) on your non-knife holding hand, dice the jalapeño and add it to the bowl. Most of the heat is in the seeds, so leave some in if you like it spicy.

Finely dice the onion and toss it in the bowl.

Chop the cilantro roughly and add it to the bowl.

Add salt and pepper to taste.

Serve with tortilla chips.

Happy Cinco De Mayo!

Maui Maniacs

Posted on
Maui Maniacs

Maui, Maui, Maui! I’ve been hearing nothing but lovely things about this island since I was a little girl. Last Spring it was finally my turn to see for myself. After scouring the internet and reading all the reviews I booked a one bedroom suite at the Hanua Kai Resort and Spa in Kaanapali. Then began the restaurant research, I emailed friends and family for recommendations and tried to read through the lines of online reviews. Going on vacation can be a lot of work!

The resort was gorgeous, right on the beach and well maintained. Duke’s Beach House is on the resort property between the three pools and the red sandy beach. We ate once at Duke’s and the best thing I can say about the food is that it was forgettable. Wish I could say the same for our first meal in Hawaii at Maui Tacos. Good thing that the resort was so fabulous, because the food hadn’t been that impressive. But, these choices had been more about convenience than anything.

While the grocery store across the road had decent local produce, there was a nice selection at a farmer’s stand by the ticket booth for the Sugar Cane Express. We took the Sugar Cane Train from Kaanapali to Lahaina for the day, another disappointing lunch at one of the interchangeable ocean front restaurants was fixed by a trip to Hula Cookies & Ice Cream where you get to design your own ice cream sandwich that can be enjoyed in the nearby park under the banyan tree.

On other visits to Lahaina, we enjoyed brunch at Mala Ocean Tavern and a lunch at a mixed plate place, can’t remember the name but we wanted to go to Aloha Mixed Plate. For afternoon treats we sucked back some Jamba Juice and couldn’t get enough froyo at Island Froyo. One more meh place and then we’ll move on to the good stuff: David Paul’s Island Grill looked good from the outside, but you shouldn’t judge a menu by its cover.

When we headed over to the fancy side Maui to check out Wailea our luck changed. We tried out a brand new restaurant called Monkeypod Kitchen by Merriman. The decor was bright and fresh, the service was professional and warm, we felt right at home. The food was locally sourced, clearly fresh and prepared with care.

Based on our positive experience at Monkeypod, we made a reservation at Merriman’s the upscale sister restaurant located in the Kapalua Resort. It was a delightful experience with a completely open dining room and top notch service provided by our server, J.J. Again, the freshest ingredients treated with respect.My husband, Exec Chef, enjoyed it so completely that he bought a gift certificate on the spot for family members that would be honeymooning in Maui a few weeks later.

Another hit in the Kapalua Resort was the oceanic treats of Sansei Seafood Restaurant & Sushi, fantastic local fish and great service in a busy room. After some memorable meals we feel like we are on a roll, hitting our stride and walking on sunshine.

Our best brunch of the trip was worth the 45 minute wait in the balmy ocean breeze. The Gazebo is just that, a round roof over tables and a kitchen right on the beach. The fluffy pancakes are served with coconut syrup and I have to recommend  the fried rice as a must share plate.

One of our favourite spots on Maui was a little town called Paia. We had a nice dinner at Milagros Food Company, but the best part was shopping at Wings Hawaii, a lovely shop filled with beautiful jewellery and clothing all made in Hawaii.

We ended our trip on a high note with a dinner at Mama’s Fish House in Paia. It was a picture perfect setting for an Elvis movie and it’s been around since he was the king. While the view was amazing and the food was excellent, it is the only time I’ve heard Exec Chef say that a dinner was overpriced!

 Mahalo!